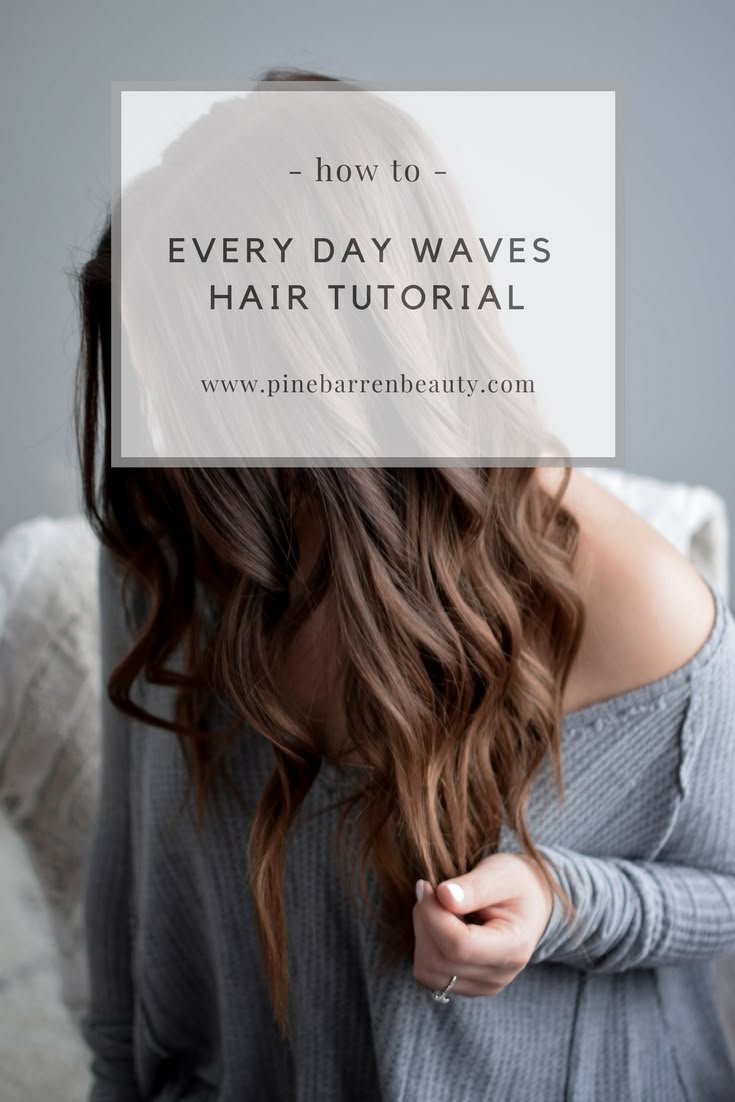

Unlock Your Inner Stylist: The Ultimate Guide to Achieving Salon-Worthy Waves at Home
Dreaming of that effortlessly chic, cascading wave that looks like it just stepped out of a high-end salon? You know the ones – the perfect bend that frames your face, adding volume, texture, and a touch of glamour to any look. While visiting your stylist is always a treat, achieving those coveted salon-worthy waves at home is not just a possibility, it’s an achievable reality with the right knowledge and tools. Forget frizzy, uninspired strands; this comprehensive guide will equip you with everything you need to master the art of beautiful, lasting waves, no appointment necessary.
Whether you’re aiming for soft, beachy ripples or polished, Hollywood glamour, the journey to stunning waves begins with understanding your hair and embracing the right techniques. We’ll delve into the essential preparation, explore the most effective styling tools, and unlock the insider tips that professional stylists swear by. Get ready to transform your at-home styling game and embrace your most wave-tastic hair yet.
The Foundation: Prepping Your Hair for Perfection
Before you even think about reaching for a styling tool, proper hair preparation is paramount. This crucial first step sets the stage for successful waves that hold their shape and shine.
Cleansing and Conditioning for Optimal Texture
Start with a good quality shampoo and conditioner suited to your hair type. For waves that have longevity, consider a volumizing shampoo or one designed to add body. Avoid heavy, moisturizing conditioners if your hair tends to be fine or easily weighed down, as they can make it harder for waves to set.
- Key Takeaway: A clean, well-conditioned canvas is essential. Think of it as preparing a blank canvas before painting a masterpiece.
The Power of Prep Products
This is where the magic truly begins. Applying the right styling products before heat styling is non-negotiable for achieving salon-worthy results. These products not only protect your hair from heat damage but also enhance hold, add shine, and combat frizz.
- Heat Protectant: This is your hair’s best friend when it comes to heat styling. A good heat protectant spray or serum creates a barrier between your hair and the hot tools, preventing dryness and breakage. Look for formulas that also offer humidity resistance for longer-lasting waves.
- Volumizing Mousse or Spray: To achieve that sought-after body and fullness, apply a volumizing mousse or spray to damp hair, focusing on the roots. This will give your waves the lift they need to look truly professional.
- Texturizing Spray or Sea Salt Spray: For those undone, beachy waves, a texturizing spray or sea salt spray is your secret weapon. Apply this to damp or dry hair to create grip and a piecey texture that mimics natural movement.
Drying Techniques: Air vs. Blow-Dry
The way you dry your hair can significantly impact the final outcome of your waves.
- Air Drying: If you have time, air drying your hair is a gentle option. However, to encourage wave formation during air drying, you can loosely braid damp hair or twist it into buns before letting it dry completely. This is a fantastic method for achieving softer, more natural-looking waves with minimal effort, perfect for the “lazy girl’s guide” approach.
- Blow Drying: For more defined waves and to speed up the process, a blow dryer is your ally. Use a medium heat setting and a nozzle attachment to direct airflow. While blow-drying, you can gently twist sections of hair with your fingers to encourage a wave pattern as it dries.
Mastering the Tools: Your Wave-Creating Arsenal
The right styling tools are critical for translating your vision into reality. Fortunately, you don’t need a professional salon’s entire collection to achieve amazing results.
Curling Irons and Wands: The Classics
These are the workhorses of wave creation, and understanding their nuances will elevate your styling.
- Curling Irons: These tools have a clamp that holds the hair section in place while you wrap it around the barrel. They are excellent for creating more uniform and structured waves.
- Curling Wands: Wands lack a clamp, allowing you to wrap the hair directly around the barrel. This offers more versatility and is ideal for creating looser, more natural-looking waves. The barrel size is crucial; smaller barrels create tighter waves, while larger barrels produce looser, more relaxed waves. A barrel size between 1.25 to 1.5 inches is a popular choice for achieving classic, versatile waves.
Beach Waver Curling Irons: Effortless Waves
The beach waver, often featuring multiple barrels, is specifically designed to create that effortless, tousled beach wave. These tools are incredibly user-friendly and can deliver salon-worthy waves with minimal effort, transforming novices into confident wave artisans. Simply clamp sections of hair between the barrels, hold for a few seconds, and release for instant, consistent waves.
Other Essential Tools
- Wide-Tooth Comb: Crucial for gently detangling hair and separating waves without disturbing their shape.
- Sectioning Clips: To keep your hair organized and allow you to work with manageable sections.
- Fine-Tooth Comb: For precise sectioning and smoothing.
- Hair Spray: A strong-hold hairspray is vital for locking your waves in place, ensuring they last throughout the day (and night!).
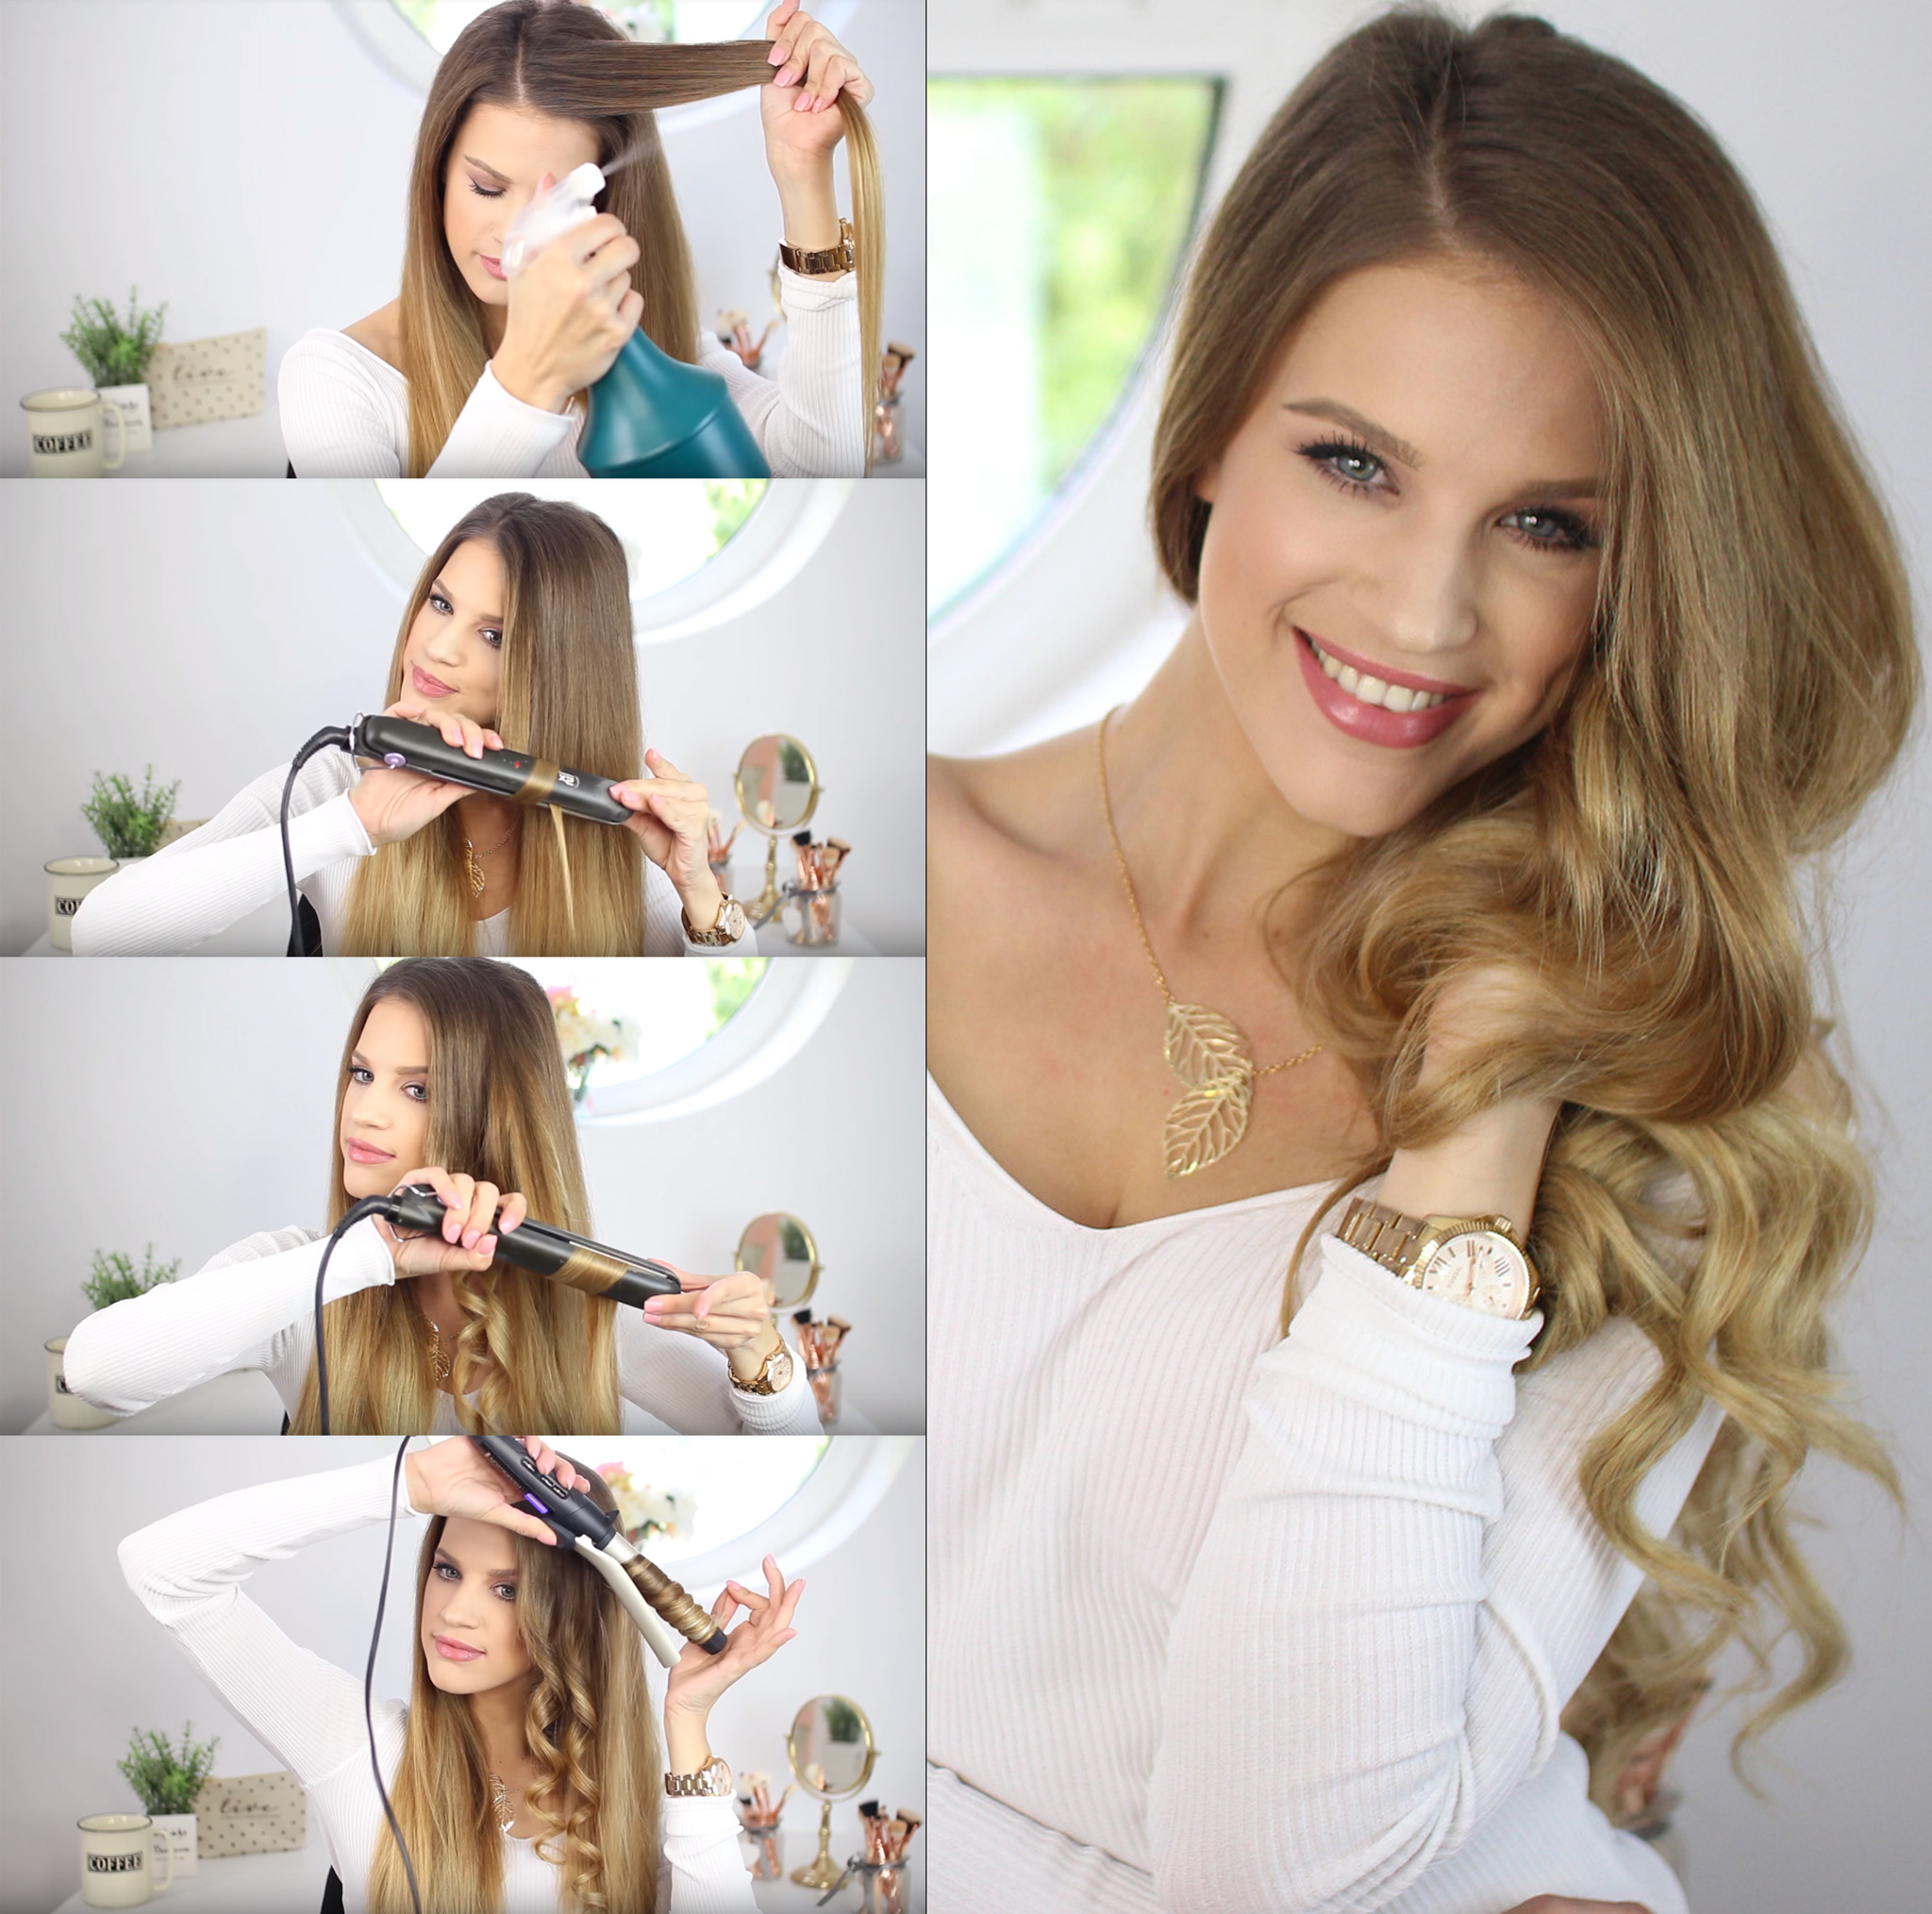
The Art of the Wave: Step-by-Step Techniques
Now that you have your tools and preparation in order, let’s get to the styling itself.
Technique 1: The Classic Curling Iron Wrap
- Section Your Hair: Divide your hair into manageable sections using sectioning clips. Start with the bottom layers, as this is often the most visible.
- Prepare the Section: Take a section of hair, about one to two inches wide, ensuring it’s smooth and tangle-free.
- Clamp and Wrap: Clamp the curling iron near the root, leaving about an inch of hair from your scalp. Wrap the remaining hair around the barrel, away from your face for a more open look, or towards your face for a more classic, face-framing style.
- Hold and Release: Hold the hair on the barrel for about 5-10 seconds, depending on your hair’s thickness and the heat setting. Slowly release the clamp and allow the wave to slide off the barrel, holding its shape.
- Cool Down: Let the freshly curled section cool completely before touching it. This is a critical step for wave longevity. You can pin the curl up against your head to help it cool and set faster.
- Repeat: Continue this process section by section, alternating the direction of the curl for a more natural, lived-in look.
Technique 2: Effortless Waves with a Curling Wand
- Section and Prepare: As with the curling iron, section your hair into manageable portions.
- Wrap Around the Wand: Take a section of hair and hold the wand vertically. Wrap the hair around the barrel, starting from the root and working your way down, leaving the ends out for a more modern, relaxed wave.
- Hold and Release: Hold for 5-10 seconds, then gently slide the wand out, allowing the wave to fall.
- Cool Completely: Allow each wave to cool and set before manipulating it.
Technique 3: The Beach Waver Method
- Part Your Hair: Decide on your desired part.
- Section and Clamp: Take a section of hair, about one to two inches wide. Place the open barrels of the beach waver at the root of your hair, ensuring the hair is between the barrels.
- Clamp Down: Clamp the waver shut for 5-10 seconds, depending on your hair type and desired wave intensity.
- Slide and Repeat: Slide the waver down slightly and clamp again to create a continuous wave pattern. Continue this motion down the length of the hair section.
- Work Through Sections: Work your way through your entire head, alternating the direction of the waver for a more natural appearance.
The Finishing Touches: Polishing Your Waves
Once all your hair is styled, it’s time for the final crucial steps to ensure your waves are truly salon-worthy and last.
The Art of Separation
Resist the urge to comb through your waves with a brush! This will likely brush out the definition and create frizz. Instead, use your fingers to gently separate the waves. For more texture and a looser feel, you can also use a wide-tooth comb, but do so with a light hand.
Locking in the Look
A good quality hairspray is your final defense against drooping waves. Hold the can about 10-12 inches away from your head and mist lightly over your entire style. For extra hold, you can spray the hair before you start curling and again after you’ve finished styling.
Adding Shine and Texture
If your hair lacks natural shine, a small amount of shine serum or hair oil, applied sparingly to the ends, can add that extra polish. For a messier, more textured look, a dry texturizing spray applied at the roots and through the mid-lengths can enhance the undone, piecey appeal.
Troubleshooting Common Wave Woes
Even with the best intentions, sometimes waves don’t turn out as planned. Here are solutions to common issues:
| Problem | Cause | Solution |
|---|---|---|
| Waves Falling Flat Quickly | Insufficient prep products, not cooling | Ensure you’re using a good heat protectant and volumizing product. Let each wave cool completely before touching it. Finish with a strong-hold hairspray. |
| Frizzy Waves | Heat damage, improper technique | Always use a heat protectant. Ensure your tools are clean and not snagging your hair. Gently separate waves with fingers, not a brush. |
| Uneven Waves | Inconsistent sectioning, heat application | Work with uniform section sizes. Hold the heat tool on each section for the same amount of time. Alternate curl direction for a more natural look. |
| Too Tight or Too Loose Waves | Wrong barrel size, heat setting, or timing | Experiment with different barrel sizes and heat settings to find what works best for your hair. Adjust the holding time accordingly. |
Embrace Your Inner Stylist
Achieving salon-worthy waves at home is an empowering journey of self-discovery and skill-building. By understanding the importance of proper preparation, choosing the right tools, and mastering a few key techniques, you can consistently create beautiful, lasting waves that turn heads. So, ditch the salon appointment dependency and embrace the confidence that comes with knowing you have the power to create gorgeous hair, anytime, anywhere. Experiment, have fun, and let your waves do the talking!
Additional Information
The Ultimate Guide to Achieving Salon-Worthy Waves at Home
Dreaming of those effortlessly chic, perfectly sculpted waves that make you feel like you just stepped out of a high-end salon? The good news is, achieving this coveted look at home is entirely within reach. As highlighted by numerous experts, the key lies in a combination of the right tools, techniques, and a solid understanding of your hair type. This comprehensive guide will delve into the essentials, from preparation to mastery, empowering you to create stunning, salon-worthy waves in the comfort of your own home.
The Foundation: Preparation and Understanding Your Hair
Before you even reach for a styling tool, setting the stage with proper preparation is crucial. As the search results emphasize, understanding your hair type is the first and most important step (Result 1).
- Hair Type Consideration: Are you working with fine, medium, or thick hair? Is it naturally straight, wavy, or curly? This will dictate the tools, heat settings, and products that will yield the best results for you. Fine hair may require gentler heat and lighter hold products, while thicker hair might benefit from higher heat and stronger hold.
- Cleanliness and Condition: Start with clean, but not necessarily freshly washed, hair. Day-old hair often has more grip and holds styles better. Ensure your hair is well-conditioned to prevent dryness and damage, especially when using heat.
- Heat Protection is Non-Negotiable: The importance of using the right tools and keeping your hair healthy while achieving the looks you love cannot be overstated. Always apply a heat protectant spray or serum to shield your strands from the damaging effects of heat styling (Result 2). This creates a barrier that minimizes moisture loss and prevents breakage.
Mastering the Tools: Your Wave-Creating Arsenal
The right styling device is the key to achieving salon-quality results. When it comes to waves, you have a few excellent options:
- The Versatile Curling Wand: A curling wand offers a seamless barrel, allowing for a more natural, less uniform wave. The ability to choose a wand that perfectly complements your hair type, styling preferences, and desired aesthetic is paramount (Result 6). Consider barrel size: smaller barrels create tighter, more defined waves, while larger barrels produce looser, more relaxed styles.
- The User-Friendly Beach Waver: For effortless, textured waves that evoke a day at the beach, the beach waver curling iron is an ingenious tool. As highlighted, mastering its technique is key to achieving optimal results, transforming novices into confident wave artisans (Result 4). These often feature multiple barrels, making the waving process faster and more intuitive.
- Innovative Styling Combs: Tools like the Soleil Styling Comb Heat Brush offer a unique approach, aiming to deliver salon-worthy hair with features like flexible guards and ionic technology for smooth, frizz-free, and shiny results (Result 7). These can be great for creating softer, more diffused waves or adding volume.
Essential Techniques for Salon-Worthy Waves
Beyond the tools, the techniques you employ will elevate your wave game:
1. Heat Styling Techniques:
- Sectioning is Key: Divide your hair into manageable sections. This ensures even heat distribution and allows for greater control over each strand.
- Direction Matters: For a polished, salon-like finish, alternate the direction you wrap the hair around the wand or waver. This creates a more voluminous and dynamic look, preventing the hair from looking too uniform or “done.”
- Cool Down Period: Once you release a curled section, try to hold it in its coiled shape for a few seconds or clip it in place until it cools completely. This helps the wave set and last longer.
- The “Down and Out” Technique: When using a curling wand, wrap the hair around the barrel, leaving the ends out for a more modern, lived-in wave.
2. Heatless Wave Techniques (For the “Lazy Girl” in all of us):
For those seeking effortless beauty without the heat, several quick and easy techniques deliver impressive results:
- Braids Before Bed: Braid your damp hair before going to bed. The tighter the braid, the more defined the waves. In the morning, undo the braids and gently separate the waves with your fingers (Result 5).
- The Twist and Bun Method: Twist your damp hair into a bun and let it dry. Once dry, release the bun for soft, natural waves (Result 5). Experiment with how tightly you twist and how many buns you create for varying wave textures.
- Pin Curls: After shampooing and towel-drying, take small sections of hair, curl them inwards towards your scalp, and secure them against your head with bobby pins. Allow your hair to air dry or use a diffuser on a cool setting.
The Finishing Touches: Setting and Styling
Once your waves are created, the right finishing touches will ensure they stay put and look polished:
- Cool Down and Finger Comb: Allow your hair to cool completely before touching it too much. Once cool, gently run your fingers through the waves to break them up and create a softer, more natural look.
- Hairspray for Hold: A light to medium-hold hairspray is your best friend for locking in your waves without making them stiff or crunchy. Spray from a distance for even distribution.
- Texturizing Spray or Sea Salt Spray: For a more lived-in, beachy texture, a texturizing spray or sea salt spray can add grit and definition.
- Gloss or Shine Serum: To add that extra bit of salon-worthy polish, a touch of gloss or shine serum on the ends can combat frizz and add luminosity.
Pro Tips for Salon-Worthy Perfection
- Practice Makes Perfect: Like any skill, mastering at-home hairstyling takes practice. Don’t get discouraged if your first attempt isn’t flawless. Keep experimenting with different tools and techniques.
- Invest in Quality Tools: While budget-friendly options exist, investing in good quality styling tools with features like ceramic or tourmaline barrels can make a significant difference in both the ease of styling and the health of your hair.
- Consider Your Hair’s Needs: Pay attention to how your hair responds to different products and heat levels. Adjust your routine accordingly.
- Don’t Overdo It: Sometimes, less is more. Avoid excessive heat or too much product, which can weigh your hair down or lead to damage.
By understanding your hair, choosing the right tools, mastering essential techniques, and applying the perfect finishing touches, you can confidently achieve salon-worthy waves at home. It’s not about being a professional stylist; it’s about equipping yourself with the knowledge and confidence to create the hair you desire. So, go forth and embrace your inner wave artisan!